Another Christmas come and gone. I realized I should have done my big end-of-year cleaning and community donating post this week and suggested some holiday songs last week instead. Well, I've only been doing this regularly for the past year, so give me a break. I'm still getting the hang of this whole editorial calendar thing...
But as the year comes to an end I thought I might offer a few more Martha Stewart-type activities for you. I was inspired by the fact that so many people in Southern California and the East Coast are completely trapped/stuck/stranded due to the extreme weather. That--and the fact that the financial district here is a ghost town--makes me think that a lot of people are taking this week off from work. (Of course, just a few blocks away in Union Square all those people are shopping up a storm, taking advantage of post-Christmas sales...)
1. Join the crowds and get some holiday cards for next year. I must say, I found some cute retro cards for half off. The trick is to stay local and support a local business, if you can. I certainly did!
2. Make some treats for a New Years Eve celebration. For the second year in a row, I made those gooey corn flake wreaths (I only just learned about them, thanks to my partner who's from Ohio and grew up with all this marshmallowy goodness.) We also decorated some fresh gingerbread cookies a friend made. I thought this could be such a fun thing to do with kids, especially if you're snowed (or flooded) in. I had just started sipping a glass of wine and couldn't stop laughing and giggling as I wrestled with the gooey mess--and I don't even have any kids!
3. Catch up. This is the best thing to do if you have this week off between Christmas and New Year's. (I don't this year, but I used to and I really miss it.) You could:
a. clean the house
b. really take the time to get over that cold/flu that's been nagging you
c. catch up on movies, books, magazines, or TV shows (great if you're stuck indoors)
d. spend time with your loved ones. Play a game like Scrabble. Get your minds working!
4. Celebrate the fact that the days are going to get longer from now on.
5. Put together that playlist for a great seasonal New Years Eve party. There are some wintery songs that I now always associate with the holidays. Here are some non-denominational ones that you could use for next year, or this weekend:
- "Valley Winter Song" by Fountains of Wayne. Wonderfully melancholy lyrics.
- "Heaven Must Be Missing An Angel" by Tavares. Heard it at the Gap during the holidays 11 years ago and now it'll always be associated with December.
- "Put A Little Love In Your Heart" by Annie Lennox and Al Green. Yes, I used it last week, but after hearing it a dozen more times since then, I still think it's great.
- "Hazy Shade of Winter" by The Bangles. What can I say? It's all about the bells.
- "Calling On Mary" by Aimee Mann. Part of her magical holiday album from a few years ago. It's a great original Christmas song.
- "Celebrate Me Home" by Kenny Loggins.
- "New Year" by Sugababes. It's bubblegum pop, but not too many people Stateside have heard this British girl group before.
- "Walk Out To Winter" by Aztec Camera.
- "A Great Big Sled" by The Killers. It's Christmas-y, but so sweeping and epic I could listen to it year-round.
- "Goodnight" by Etienne de Rocher. A sweet, sweet song. Maybe the best way to end your night and ring in the New Year this Friday. I'm so glad I got to interview him years ago for a magazine article...
Any other suggestions? Let me know--I'm always looking to expand my holiday playlist for next year!
All original work © Jason W. Wong. Please ask for permission to reproduce any work.
Monday, December 27, 2010
Sunday, December 19, 2010
Think of your fellow man, lend him a helping hand. Put a little love in your heart...
Wow, this is it--the week of Christmas (if that's what you celebrate)!
This year has been pretty low-key for my little household. We decided to just exchange a few little gifts, and for the ninth (?) year in a row, we're having a big Chinese dinner with some (mostly) Jewish friends on Christmas Eve.
So what's the big how-to tip for this week? I wish I had photos from all my various "theme" trees over the years to share with you. I've always started with some "base ornaments" of plain silver and clear glass balls that create a foundation from which I used to add handmade decorations each year. One year it was all white origami cranes. Another year it was papier-mache Day of the Dead-style Mexican skeletons and cardinals and crepe paper snowflakes. The year I did homemade gingerbread ornaments with popcorn/cranberry garlands didn't work so well--the gnats started appearing after a week or two...
But I had a better idea for this week: How about decluttering your home and getting rid of some old things that could be better used by others?
For instance, my partner and I just donated a big box of books to Community Thrift in San Francisco, where you can designate the beneficiaries of your donation. So when/if these books sell, community organizations that we've chosen like the SPCA or Pets Unlimited will receive part of the proceeds. A good friend of ours is also having a book exchange party on Tuesday that allows us to part with a cherished book and receive another one that was once equally important to someone else. What a great way to share.
We're going to give our old (clean) towels directly to Pets Unlimited, where they can be used to wash/dry/comfort dogs and cats who have been rescued from the area. This local no-kill shelter has a special place in our hearts because it's where I got our magical cat over eight years ago.
And old electronics (even broken ones) will be sent to Goodwill, where they can be recycled even if they no longer work. I must say, it's better than throwing away those tools and gadgets with missing parts or chargers. Old (but working) cellphones will go to Verizon, where they either recycle them or donate them to victims of domestic violence.
At Ye Olde Dayjobbe, we had a surplus of paint from a commercial project (25 gallons of off-white interior latex paint!) What to do? I contacted our local school district, who are more than happy for the donation. Other places that can accept business donations or large quantities of things are SCRAP (who will provide my old interior samples to teachers who can re-use them for art/craft projects) and Habitat for Humanity. Local mural artists Precita Eyes would have also taken the extra paint from my office. Check in with your local organizations and nonprofits--they might be able to use your in-kind donations, too.
It feels good to not only get rid of "stuff" that's cluttering my back storage room, but to know that's it's going to a good cause. That's two-thirds of what Retrograde is all about--rethinking and recycling!
These days, not all of us can give monetary donations (I know I've had to tighten my own belt a little since making the transition to interiors.) So these in-kind contributions are a way for many of us to still help. Share your own links and organizations with your family, friends, and colleagues.
Put a little love in your heart...and have a good holiday!
This year has been pretty low-key for my little household. We decided to just exchange a few little gifts, and for the ninth (?) year in a row, we're having a big Chinese dinner with some (mostly) Jewish friends on Christmas Eve.
So what's the big how-to tip for this week? I wish I had photos from all my various "theme" trees over the years to share with you. I've always started with some "base ornaments" of plain silver and clear glass balls that create a foundation from which I used to add handmade decorations each year. One year it was all white origami cranes. Another year it was papier-mache Day of the Dead-style Mexican skeletons and cardinals and crepe paper snowflakes. The year I did homemade gingerbread ornaments with popcorn/cranberry garlands didn't work so well--the gnats started appearing after a week or two...
But I had a better idea for this week: How about decluttering your home and getting rid of some old things that could be better used by others?
For instance, my partner and I just donated a big box of books to Community Thrift in San Francisco, where you can designate the beneficiaries of your donation. So when/if these books sell, community organizations that we've chosen like the SPCA or Pets Unlimited will receive part of the proceeds. A good friend of ours is also having a book exchange party on Tuesday that allows us to part with a cherished book and receive another one that was once equally important to someone else. What a great way to share.
We're going to give our old (clean) towels directly to Pets Unlimited, where they can be used to wash/dry/comfort dogs and cats who have been rescued from the area. This local no-kill shelter has a special place in our hearts because it's where I got our magical cat over eight years ago.
And old electronics (even broken ones) will be sent to Goodwill, where they can be recycled even if they no longer work. I must say, it's better than throwing away those tools and gadgets with missing parts or chargers. Old (but working) cellphones will go to Verizon, where they either recycle them or donate them to victims of domestic violence.
At Ye Olde Dayjobbe, we had a surplus of paint from a commercial project (25 gallons of off-white interior latex paint!) What to do? I contacted our local school district, who are more than happy for the donation. Other places that can accept business donations or large quantities of things are SCRAP (who will provide my old interior samples to teachers who can re-use them for art/craft projects) and Habitat for Humanity. Local mural artists Precita Eyes would have also taken the extra paint from my office. Check in with your local organizations and nonprofits--they might be able to use your in-kind donations, too.
It feels good to not only get rid of "stuff" that's cluttering my back storage room, but to know that's it's going to a good cause. That's two-thirds of what Retrograde is all about--rethinking and recycling!
These days, not all of us can give monetary donations (I know I've had to tighten my own belt a little since making the transition to interiors.) So these in-kind contributions are a way for many of us to still help. Share your own links and organizations with your family, friends, and colleagues.
Put a little love in your heart...and have a good holiday!
Tuesday, December 14, 2010
Hang me up to dry
Short post this week (and late) because I got sidetracked by a few things: a bathroom remodel I'm working on is having some tile issues; Ye Olde Dayjobbe is getting busier for some reason; and I got a callback after going to an HGTV audition.
!!!!
Yeah, that's right. Keep your fingers crossed, true believers.
One thing I talked about during my initial casting and subsequent callback was overcoming inertia just doing something. So many folks have art, posters, or even wrapping paper that can hung on the walls. "But I don't have any frames!" I hear. Or, "custom framing costs too much and takes too long!"
Well, something I've been using for years are steel bullnose clips. They're a little more old-school/retro/stylish than your average black-and-metal binder clips, and they're good for hanging art. For large pieces, like my old London bus roll which I've had for years now, I specifically choose bullnose clips for hanging.
Maybe you'll have that print or poster framed eventually. But in the meantime, enjoy the no-fuss hanging!
Got pictures of cool things you've hung with bullnose clips, or even pant hangers? Send me photos--I want to see 'em!
!!!!
Yeah, that's right. Keep your fingers crossed, true believers.
One thing I talked about during my initial casting and subsequent callback was overcoming inertia just doing something. So many folks have art, posters, or even wrapping paper that can hung on the walls. "But I don't have any frames!" I hear. Or, "custom framing costs too much and takes too long!"
Well, something I've been using for years are steel bullnose clips. They're a little more old-school/retro/stylish than your average black-and-metal binder clips, and they're good for hanging art. For large pieces, like my old London bus roll which I've had for years now, I specifically choose bullnose clips for hanging.
But they're also great for quick, down-and-dirty hangings, like right after you move into a new place, or to just experiment to see if you like the placement of something.
Maybe you'll have that print or poster framed eventually. But in the meantime, enjoy the no-fuss hanging!
Got pictures of cool things you've hung with bullnose clips, or even pant hangers? Send me photos--I want to see 'em!
Monday, December 6, 2010
Smells like teen spirit...
I know it's December and it's getting cold out there, but with a big cat and a partner who likes to crank up the heat, my home can get pretty dusty and dry any time of the year. So what do I do? I try to open up the windows and doors to air the place out every week.
I remember when I was staying with my aunt and I noticed that her family kept most windows every so slightly cracked open during the days, even in the winter. I used to wonder why it was always so cold in there during the day, but now that I'm in a never-ending battle against dust and mold, I can understand why she did it. Before we moved in together, my partner used to live in a studio apartment and kept his heater cranked up in the winter, letting the windows get all steamy. One day I noticed something on the wall next to his bed. Pushing the bed aside, we discovered all the condensation on the walls and windows allowed a huge patch of mold to grow on the wall!
Ewwww!
So opening up windows while you clean is a nice, natural way to air out a room. But what do you do when it's too cold outside and things are starting to smell a little stale in your house? (I know there are some readers in the midwest and east cost!)
Seriously, I've become a convert to these sprays--they beat the heck out of those cans of Lysol, Glade or Wizard from my childhood days. At my office we use Diptyque's fig scented spray and it (ahem) really works.
Last time one of my colleagues went, they also picked up a ton of samples, which are also used in their line of personal scents--I ended up liking the light citrus scent of Oyedo so much, I started wearing it on occasion.
Hey, it's better than Axe, and it's considerably cheaper than what I normally wear. All good stuff, and good for holiday gift giving!
I remember when I was staying with my aunt and I noticed that her family kept most windows every so slightly cracked open during the days, even in the winter. I used to wonder why it was always so cold in there during the day, but now that I'm in a never-ending battle against dust and mold, I can understand why she did it. Before we moved in together, my partner used to live in a studio apartment and kept his heater cranked up in the winter, letting the windows get all steamy. One day I noticed something on the wall next to his bed. Pushing the bed aside, we discovered all the condensation on the walls and windows allowed a huge patch of mold to grow on the wall!
Ewwww!
So opening up windows while you clean is a nice, natural way to air out a room. But what do you do when it's too cold outside and things are starting to smell a little stale in your house? (I know there are some readers in the midwest and east cost!)
- Try vacuuming with a HEPA filter to trap all those allergens that are making you sneeze (cranking up the heaters can dry up your skin creating even more dust)
- Wash your bedding, sofa/TV throws, and towels often, using a naturally scented detergent (Trader Joe's and Method use essential oils)
- I'm not a big fan of air purifiers, but if you have to use them, go for it--science wins!
- Fresh cut flowers are another natural way to scent a room (unless you're allergic like me--stargazer lilies are my kryptonite)
- Instead of heavily scented candles, invest in a nice room spray like something from Diptyque or Mrs. Meyers.
Seriously, I've become a convert to these sprays--they beat the heck out of those cans of Lysol, Glade or Wizard from my childhood days. At my office we use Diptyque's fig scented spray and it (ahem) really works.
Last time one of my colleagues went, they also picked up a ton of samples, which are also used in their line of personal scents--I ended up liking the light citrus scent of Oyedo so much, I started wearing it on occasion.
Hey, it's better than Axe, and it's considerably cheaper than what I normally wear. All good stuff, and good for holiday gift giving!
Monday, November 29, 2010
I walk the line
When hanging art, I've been extolling the virtues of salon-style groupings to achieve an eclectic look and casual feel.
Why? Because it suits a variety of different frame styles, which is what a lot of my Retrograde clients have. And also because it takes away the pressure of having your art and photos spaced perfectly or aligned. For me, it's more important to get those pieces of art out of the storage boxes and up on the walls. However, the process isn't totally random. I like to use key lines to arrange art on walls. (That just means lining up certain edges of your pieces.)
Here are some examples (the key lines are marked in red):
Why? Because it suits a variety of different frame styles, which is what a lot of my Retrograde clients have. And also because it takes away the pressure of having your art and photos spaced perfectly or aligned. For me, it's more important to get those pieces of art out of the storage boxes and up on the walls. However, the process isn't totally random. I like to use key lines to arrange art on walls. (That just means lining up certain edges of your pieces.)
Here are some examples (the key lines are marked in red):
In this example (above), you can see that the key line can also go down the center of several pieces.
Top and bottom key lines are easy ways to line things up, especially if you're really keen on maintaining order.
For this family gallery mockup, I layed out a 4' x 8' area of white space to simulate the portion of wall I was working with in a single family home. (When planning a grouping of so many photos or art, it can help to lay things out on the floor first...)
It's like a big puzzle, so go ahead and give it a try--play around! Like I said before, it's better than keeping your art and photos in storage. And if you mess up, just invest in a tub of spackle from your local hardware store to fill in the holes ;-)
Sunday, November 21, 2010
I see your true colors shining through...
One of my clients has been going through a lot of paint samples to see what will work in several rooms of their busy family home. I know that once they're ready to start painting the final colors, there will be some questions about the process. These same questions will pop up whether you decide to do the painting yourself or hire professionals. (I know--I've done it myself and I've worked with professionals through my dayjob.)
Luckily my friend Caroline Myers recapped the process step-by-step on her blog. Her instructions ensure that the color you choose from those tiny paint chips becomes the final color on your walls/cabinets/furniture/whatever. There are some extra steps that I didn't use 10 years ago when I painted my first "adult" bedroom, but trust me when I say that those steps are vital.
She used some kitchen cabinets as an example. Here's the BEFORE picture:
Here are her two vital tips to remember:
1. Get brush-outs of your paint samples. The paint chips at the paint store are not actual paint, so therefore there can be (and will be) color variances. Having a brush-out will give you an accurate picture of what color you are looking at.
2. ***THIS STEP IS KEY*** Once you have selected your paint color from your brush-out samples, order the paint and have them BRUSH OUT YOUR ACTUAL PAINT. This simple step can save you soooo much time. We spent two days getting an excellent paint job on our cabinets. We left for dinner to let them dry, came back and started putting in drawers and holding up the cabinets to get a sneak peak on the final picture. Once we held them up it was VERY apparent that we had the wrong color. We then painted some of our quart of paint to our original brush-out and sure enough the paint store had mixed it wrong. This color was incredibly blue compared to the color we had selected. So we had to spend an extra two days applying the correct paint color to the cabinets. So please please have the paint store brush out the actual paint so you can compare it to your sample brush out.
She has even more tips for painting cabinets or wood. Check out all the steps on her blog.
Luckily my friend Caroline Myers recapped the process step-by-step on her blog. Her instructions ensure that the color you choose from those tiny paint chips becomes the final color on your walls/cabinets/furniture/whatever. There are some extra steps that I didn't use 10 years ago when I painted my first "adult" bedroom, but trust me when I say that those steps are vital.
She used some kitchen cabinets as an example. Here's the BEFORE picture:
And here's the AFTER:
Here are her two vital tips to remember:
1. Get brush-outs of your paint samples. The paint chips at the paint store are not actual paint, so therefore there can be (and will be) color variances. Having a brush-out will give you an accurate picture of what color you are looking at.
2. ***THIS STEP IS KEY*** Once you have selected your paint color from your brush-out samples, order the paint and have them BRUSH OUT YOUR ACTUAL PAINT. This simple step can save you soooo much time. We spent two days getting an excellent paint job on our cabinets. We left for dinner to let them dry, came back and started putting in drawers and holding up the cabinets to get a sneak peak on the final picture. Once we held them up it was VERY apparent that we had the wrong color. We then painted some of our quart of paint to our original brush-out and sure enough the paint store had mixed it wrong. This color was incredibly blue compared to the color we had selected. So we had to spend an extra two days applying the correct paint color to the cabinets. So please please have the paint store brush out the actual paint so you can compare it to your sample brush out.
She has even more tips for painting cabinets or wood. Check out all the steps on her blog.
Monday, November 15, 2010
I've been looking so long at these pictures of you, that I almost believe that they are real...
Last week I showed how I customized a pretty basic piece of Ikea furniture. In the original post (about a young doctor on a budget) I also mentioned a bulletin board I created from another Ikea piece, the Ung Drill frame.
This week I want to show you how I created this:
This one is also really easy to do. I began with the $29.99 Ung Drill frame, which is basically a piece of black plastic--but it has a great shape. You could do this project with any thrift store frame.
I took out the glass and cardboard backing (save the cardboard--it's going to be the backing of your bulletin board.) I actually had some problem getting the glass out, but after I bent back the brackets holding it in place, I left it out in a cold space (my utility room) and by the next day the glass had contracted and came out easily.
Next, I used some metallic spray paint (Krylon metallics in Bright Gold) and gave the black frame one really light coat. After it had dried for an hour or so, I distressed the edges of the frame with some fine-gauge steel wool so parts of the original black came through. Then I used the glass (you can also use the cardboard backing) as a template for cutting out the fabric and other materials.
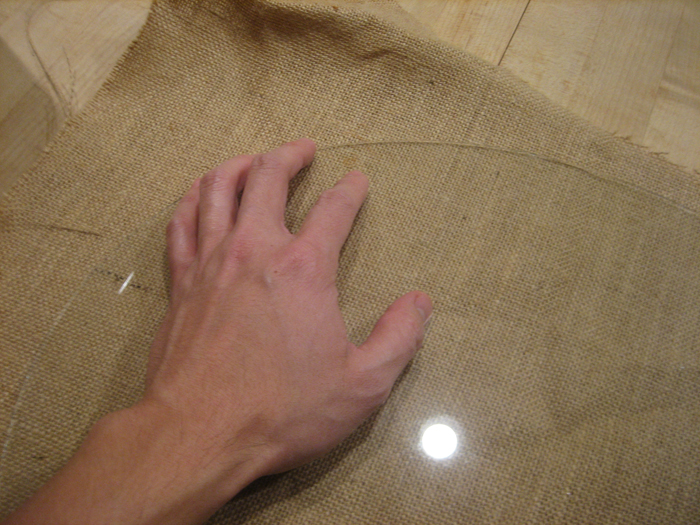
For the fabric (I used jute from Cliff's Variety, but you could use canvas, linen, or any other fabric), be sure to leave at least an inch of extra material so you can wrap it around the backing.
Originally, I was going to use cork as the "soft" material under the fabric, but the price of cork tiles and rolled sheets was a LOT more expensive than I remembered...so I used something else I had lying around: quilt batting. I realize not everyone has this stuff in their home, but once again you could recycle other materials for this. Maybe a bunch of old t-shirts or even denim...the point is to get about half an inch of padding so your thumbtacks won't go through the cardboard backing.
This material should actually be cut to the exact same size as the backing.
I actually used four layers of this particular batting (also originally from Cliff's) to get half an inch.
After I put the batting on top of the cardboard and wrapped the jute around everything, I simply used good ol' Scotch masking tape to take the extra jute down. I know it seems...ghetto. But it honestly works well. One of my old teachers at FIDM taught us how to wrap and tape fabric samples for display boards and it all came down to regular masking tape.
The entire process was quick--kind of a fun rainy day project (yes, it was actually raining when I did this--hard to believe with the current heat wave we're having!) And the finished piece is something that really suited this young woman's apartment and newfound style.
Subscribe to:
Posts (Atom)